


Table of Contents
Figma, a cloud-based design tool, has become a favorite among designers for its collaborative features and intuitive interface. This blog aims to help you enhance your Figma workflow with time-saving tips, tricks, and plugins, ensuring you spend less time on repetitive tasks and more time on creative design.
Understanding Figma Basics
For those new to the platform, Figma is a versatile design tool that allows for real-time collaboration, making it a favorite for team projects. It operates entirely in the cloud, meaning you can access your work from any device with an internet connection.
Figma’s interface is user-friendly, with a range of tools for creating wireframes, prototypes, and high-fidelity designs. If you’re wondering why Figma is the best choice for designers, it’s because of its seamless integration of essential design features and its ability to foster collaboration across different teams and devices.
Keyboard Shortcuts
One of the quickest ways to speed up your Figma workflow is by mastering keyboard shortcuts. Here are some essential shortcuts that can save you valuable time:
- Duplicate:
Ctrl/Cmd + D - Group:
Ctrl/Cmd + G - Frame:
F - Select All:
Ctrl/Cmd + A - Undo:
Ctrl/Cmd + Z - Redo:
Ctrl/Cmd + Shift + Z - Zoom In:
Ctrl/Cmd + Plus (+) - Zoom Out:
Ctrl/Cmd + Minus (-)
These shortcuts help you perform common tasks quickly, reducing the need for constant mouse movements and clicks. For a comprehensive list of shortcuts, you can check Figma’s keyboard shortcuts panel.
Layer Management
Efficient layer management is crucial for maintaining an organized and streamlined workflow. Here are some tips to help you manage your layers effectively:
- Using Naming Conventions: Consistent and descriptive naming conventions make it easier to locate and understand different elements in your design. For example, use names like
Button-Primary,Heading-H1, orIcon-Searchto clearly indicate the purpose of each layer. - Grouping and Framing Elements: Group related layers together to keep your workspace tidy. Use frames to create a clear hierarchy and structure within your design. This helps in organizing your work and makes it easier to navigate and modify specific elements.
By following these best practices, you can create a more efficient and less cluttered design environment, allowing you to focus on what truly matters—your creative work.
Essential Plugins for Designers
Integrating plugins into your Figma workflow can be a game-changer. Plugins extend the functionality of Figma, allowing you to automate repetitive tasks, enhance your design capabilities, and ensure your designs meet specific standards such as accessibility.
Using plugins saves time, improves efficiency, and lets you focus more on the creative aspects of your projects. Whether you’re working on a tight deadline or aiming to elevate the quality of your designs, plugins offer a myriad of benefits that can significantly streamline your workflow.
Top Plugins
Let’s dive into some of the top plugins that can help you optimize your Figma workflow:
Content Reel
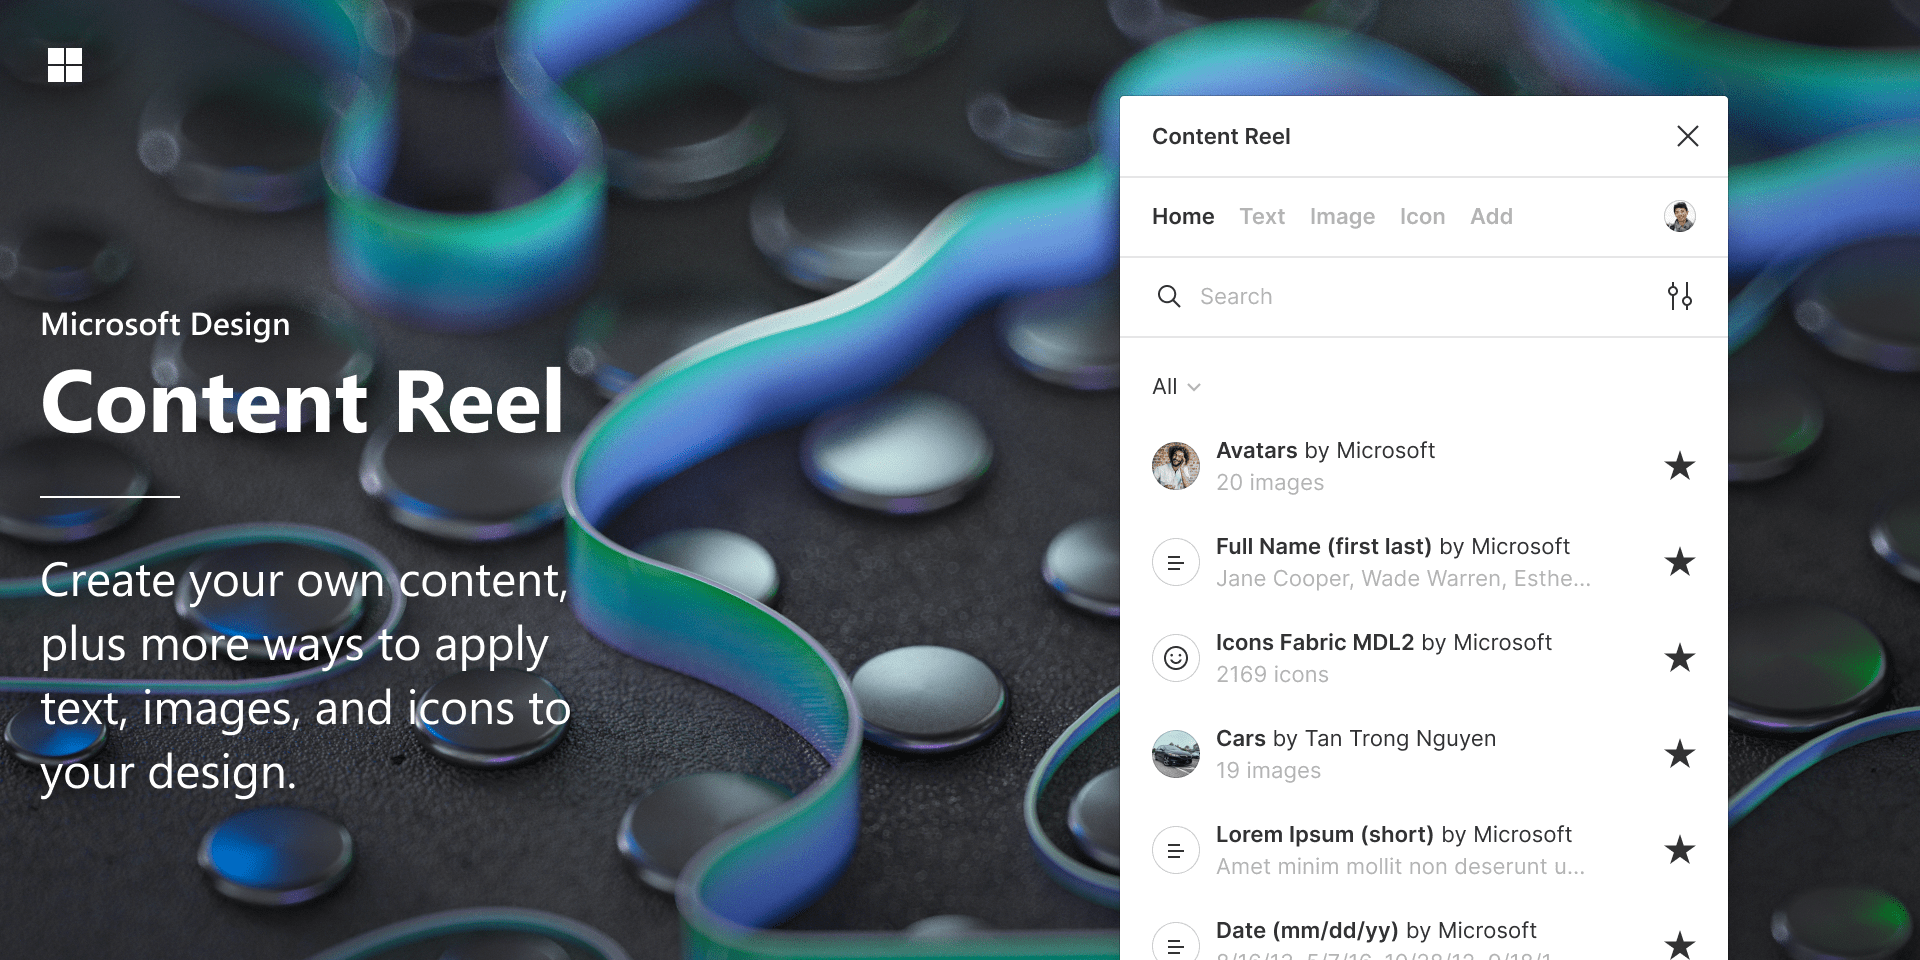
Content Reel is a versatile plugin that allows you to easily add placeholder text, images, and icons to your designs. This is particularly useful when you need to quickly populate your layouts with realistic content without having to manually create or find it.
- How it works: Select one or more layers in your design, then choose a content type from the Content Reel palette to apply.
- Benefits: Saves time by providing a quick and easy way to add content, enhances the realism of your mockups, and supports collaboration by allowing you to share custom content with other Figma users.
Unsplash
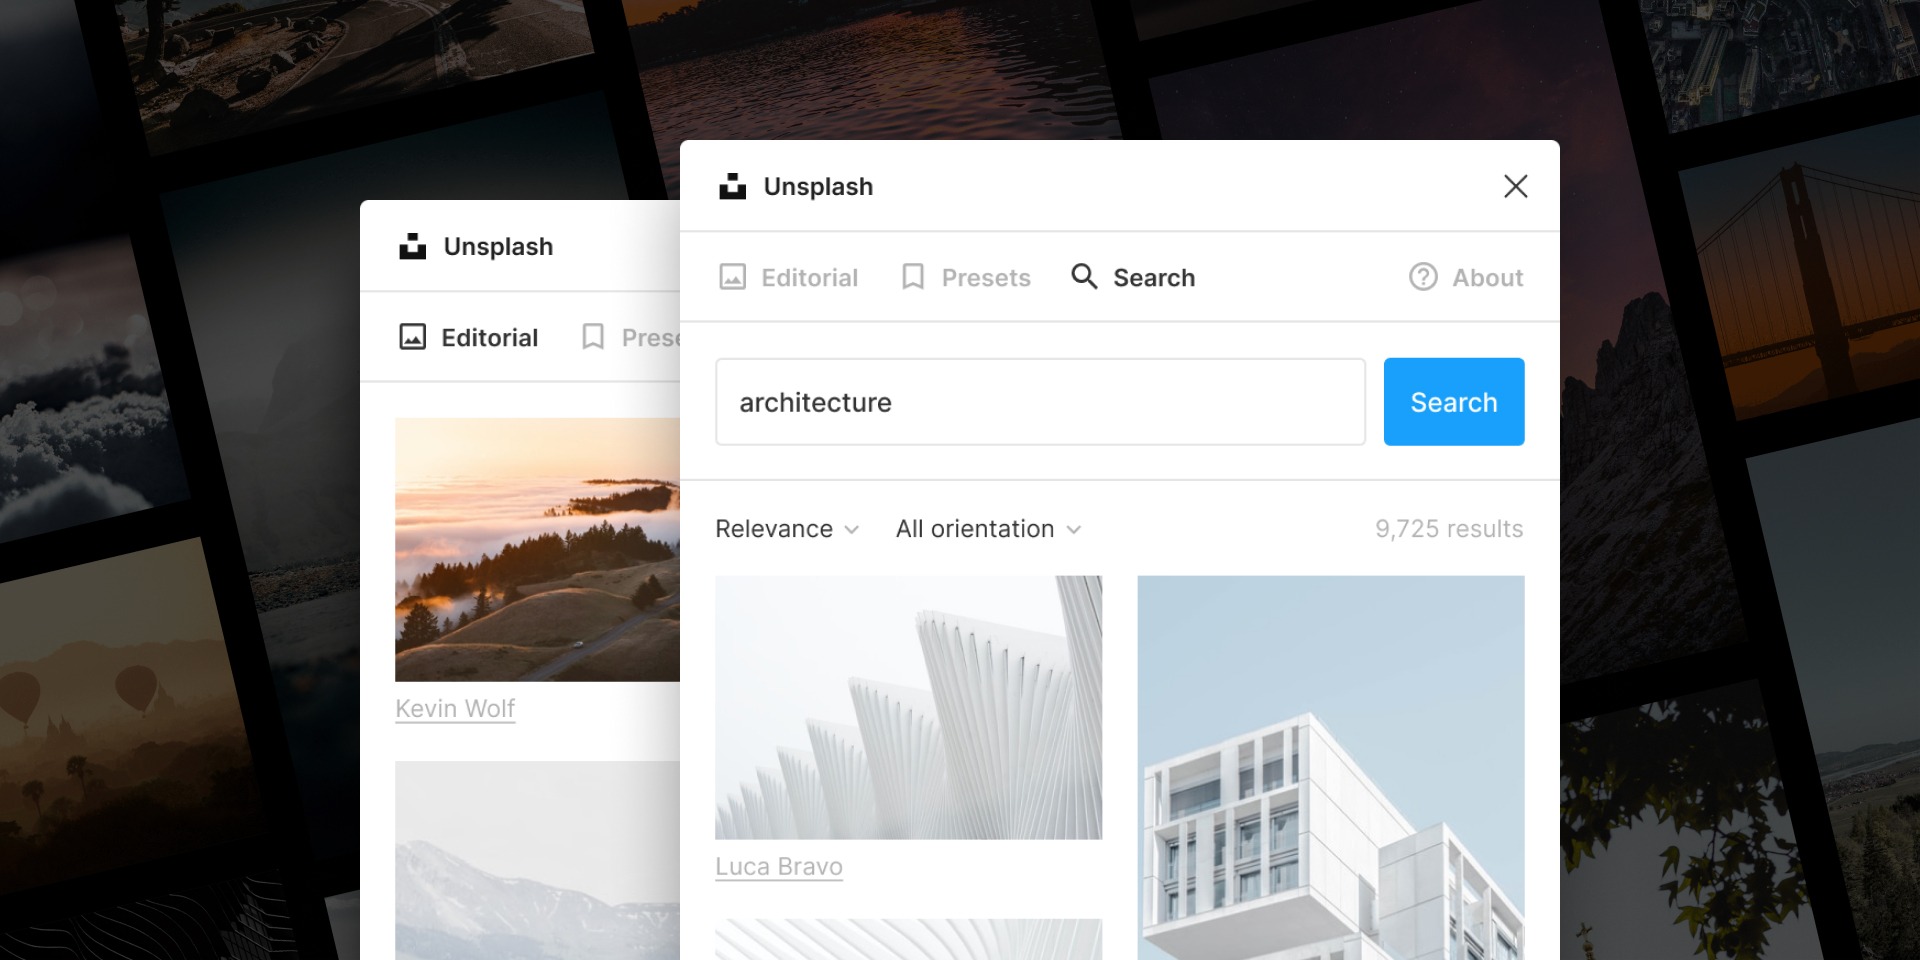
Unsplash is a popular plugin that enables you to quickly insert high-quality images into your designs. With a vast library of free-to-use photos, Unsplash makes it easy to find the perfect image to complement your design.
- How it works: Install the plugin, search for images directly within Figma, and drag them into your design.
- Benefits: Access to a wide range of high-quality images, saves time on image sourcing, and enhances the visual appeal of your designs.
Stark
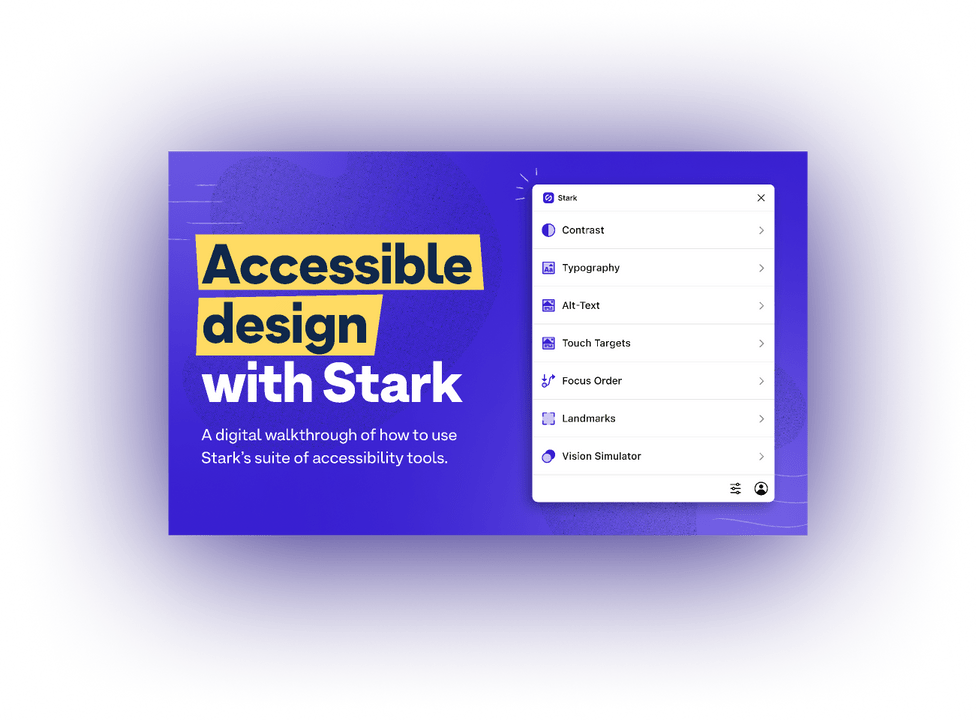
Stark is an essential plugin for ensuring accessibility in your designs. It provides tools like a contrast checker, color suggestions, and alt-text annotations to help you create designs that are accessible to all users.
- How it works: Open the Stark plugin in Figma, and use its tools to check and improve the accessibility of your design elements.
- Benefits: Ensures compliance with accessibility standards, improves the usability of your designs, and educates designers on best practices for accessibility.
Autoflow
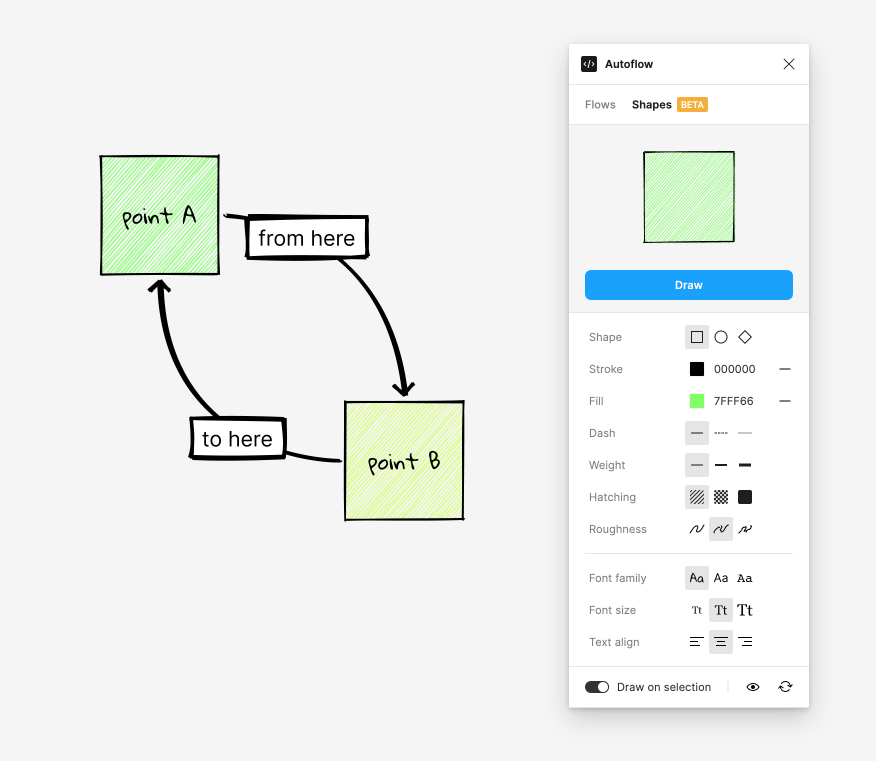
Autoflow is a handy plugin for creating flow diagrams and visual representations effortlessly. It helps you establish user flows by connecting objects with arrows, making it easier to visualize the user journey.
- How it works: Select the objects you want to connect, and Autoflow will automatically draw arrows between them.
- Benefits: Simplifies the process of creating user flows, enhances the clarity of your design presentations, and saves time on manual diagram creation.
Figmotion
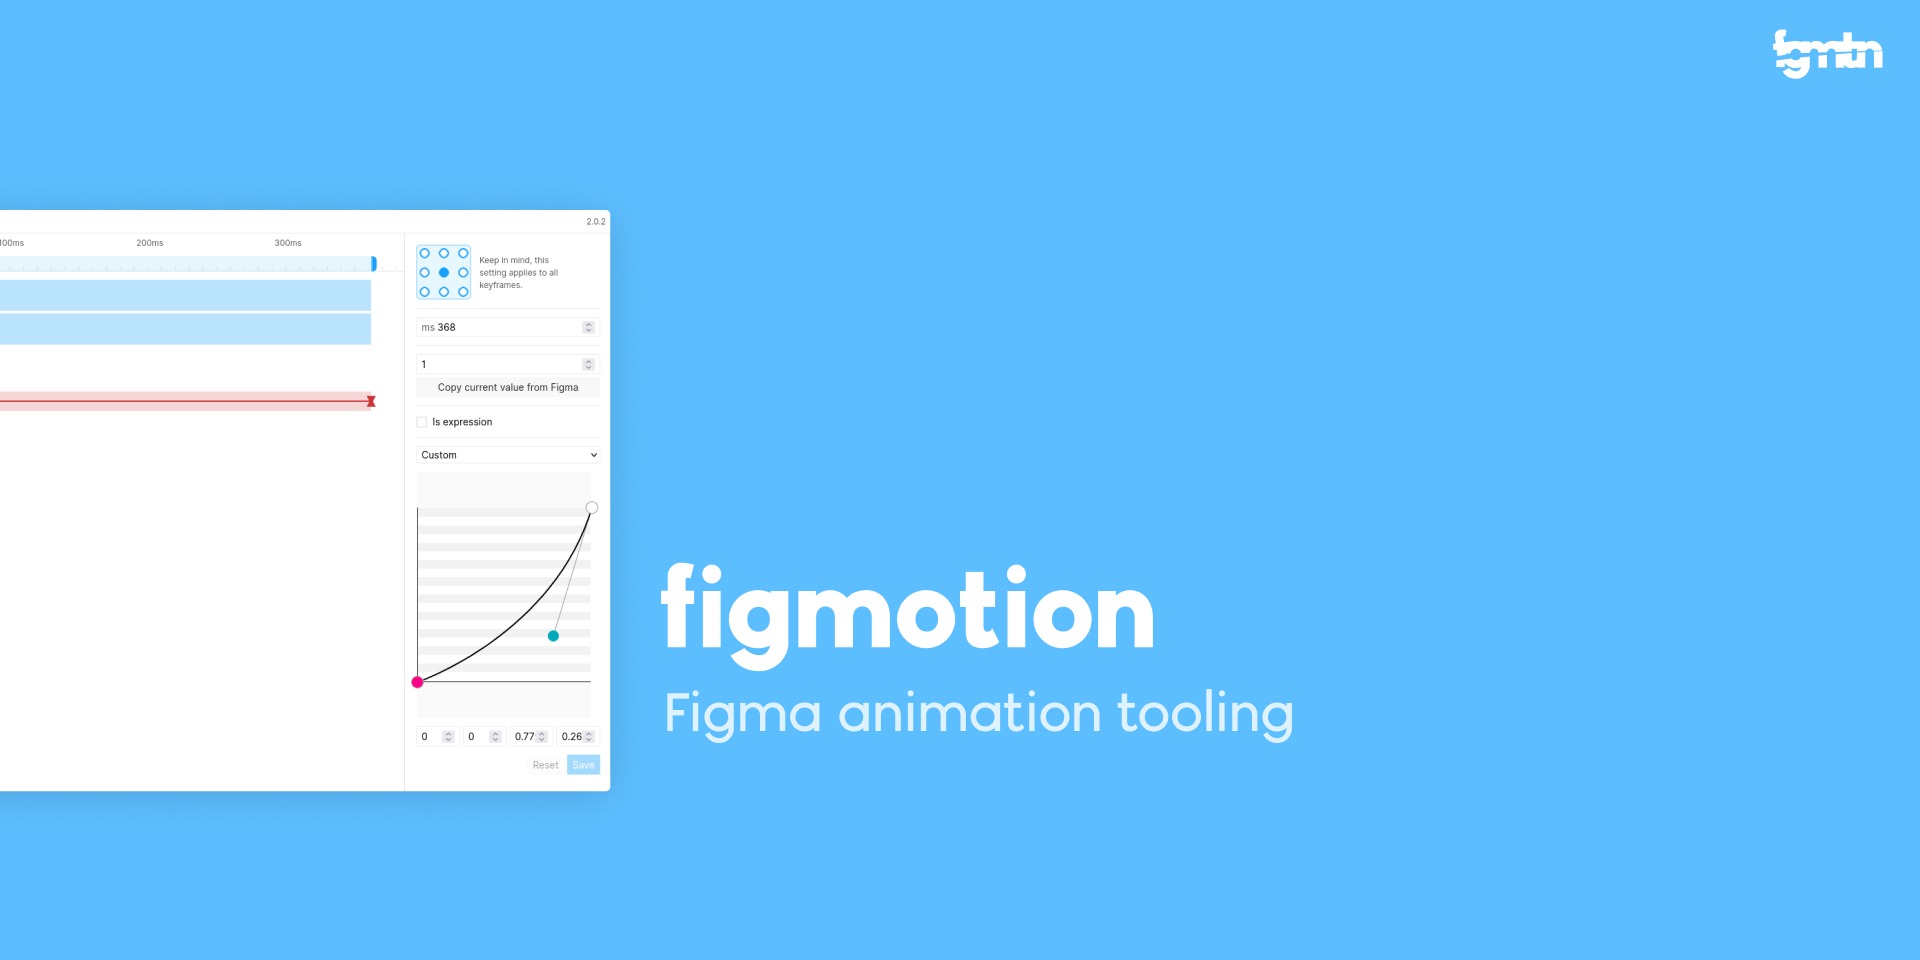
Figmotion is a powerful animation plugin that allows you to create animations directly within Figma. It’s perfect for adding interactive elements to your designs without needing to switch to another tool.
- How it works: Install Figmotion, select the layers you want to animate, and use the plugin’s interface to create and preview animations.
- Benefits: Adds dynamic elements to your designs, enhances interactive prototypes, and offers a user-friendly interface with a gentle learning curve.
Streamlining Specific Tasks
Creating and using design systems in Figma is essential for maintaining consistency across your projects. A well-structured design system streamlines your workflow and ensures that your designs adhere to a unified style and standard.
- Setting up Components and Styles: Start by defining your styles, which include color palettes, typography, and effects like shadows and blurs. These styles can be reused across different components, ensuring consistency. Components are the reusable building blocks of your design system, such as buttons, icons, and form elements. By creating components and their variants, you can easily manage and update these elements across your entire project.
- Using Shared Libraries: Figma allows you to publish your styles and components as a library, which can be shared with your team. This enables everyone to access and use the same design elements, promoting consistency and collaboration. You can organize your library into different files for various aspects of your design system, such as foundational styles, icons, and specific components for web and mobile.
Prototyping
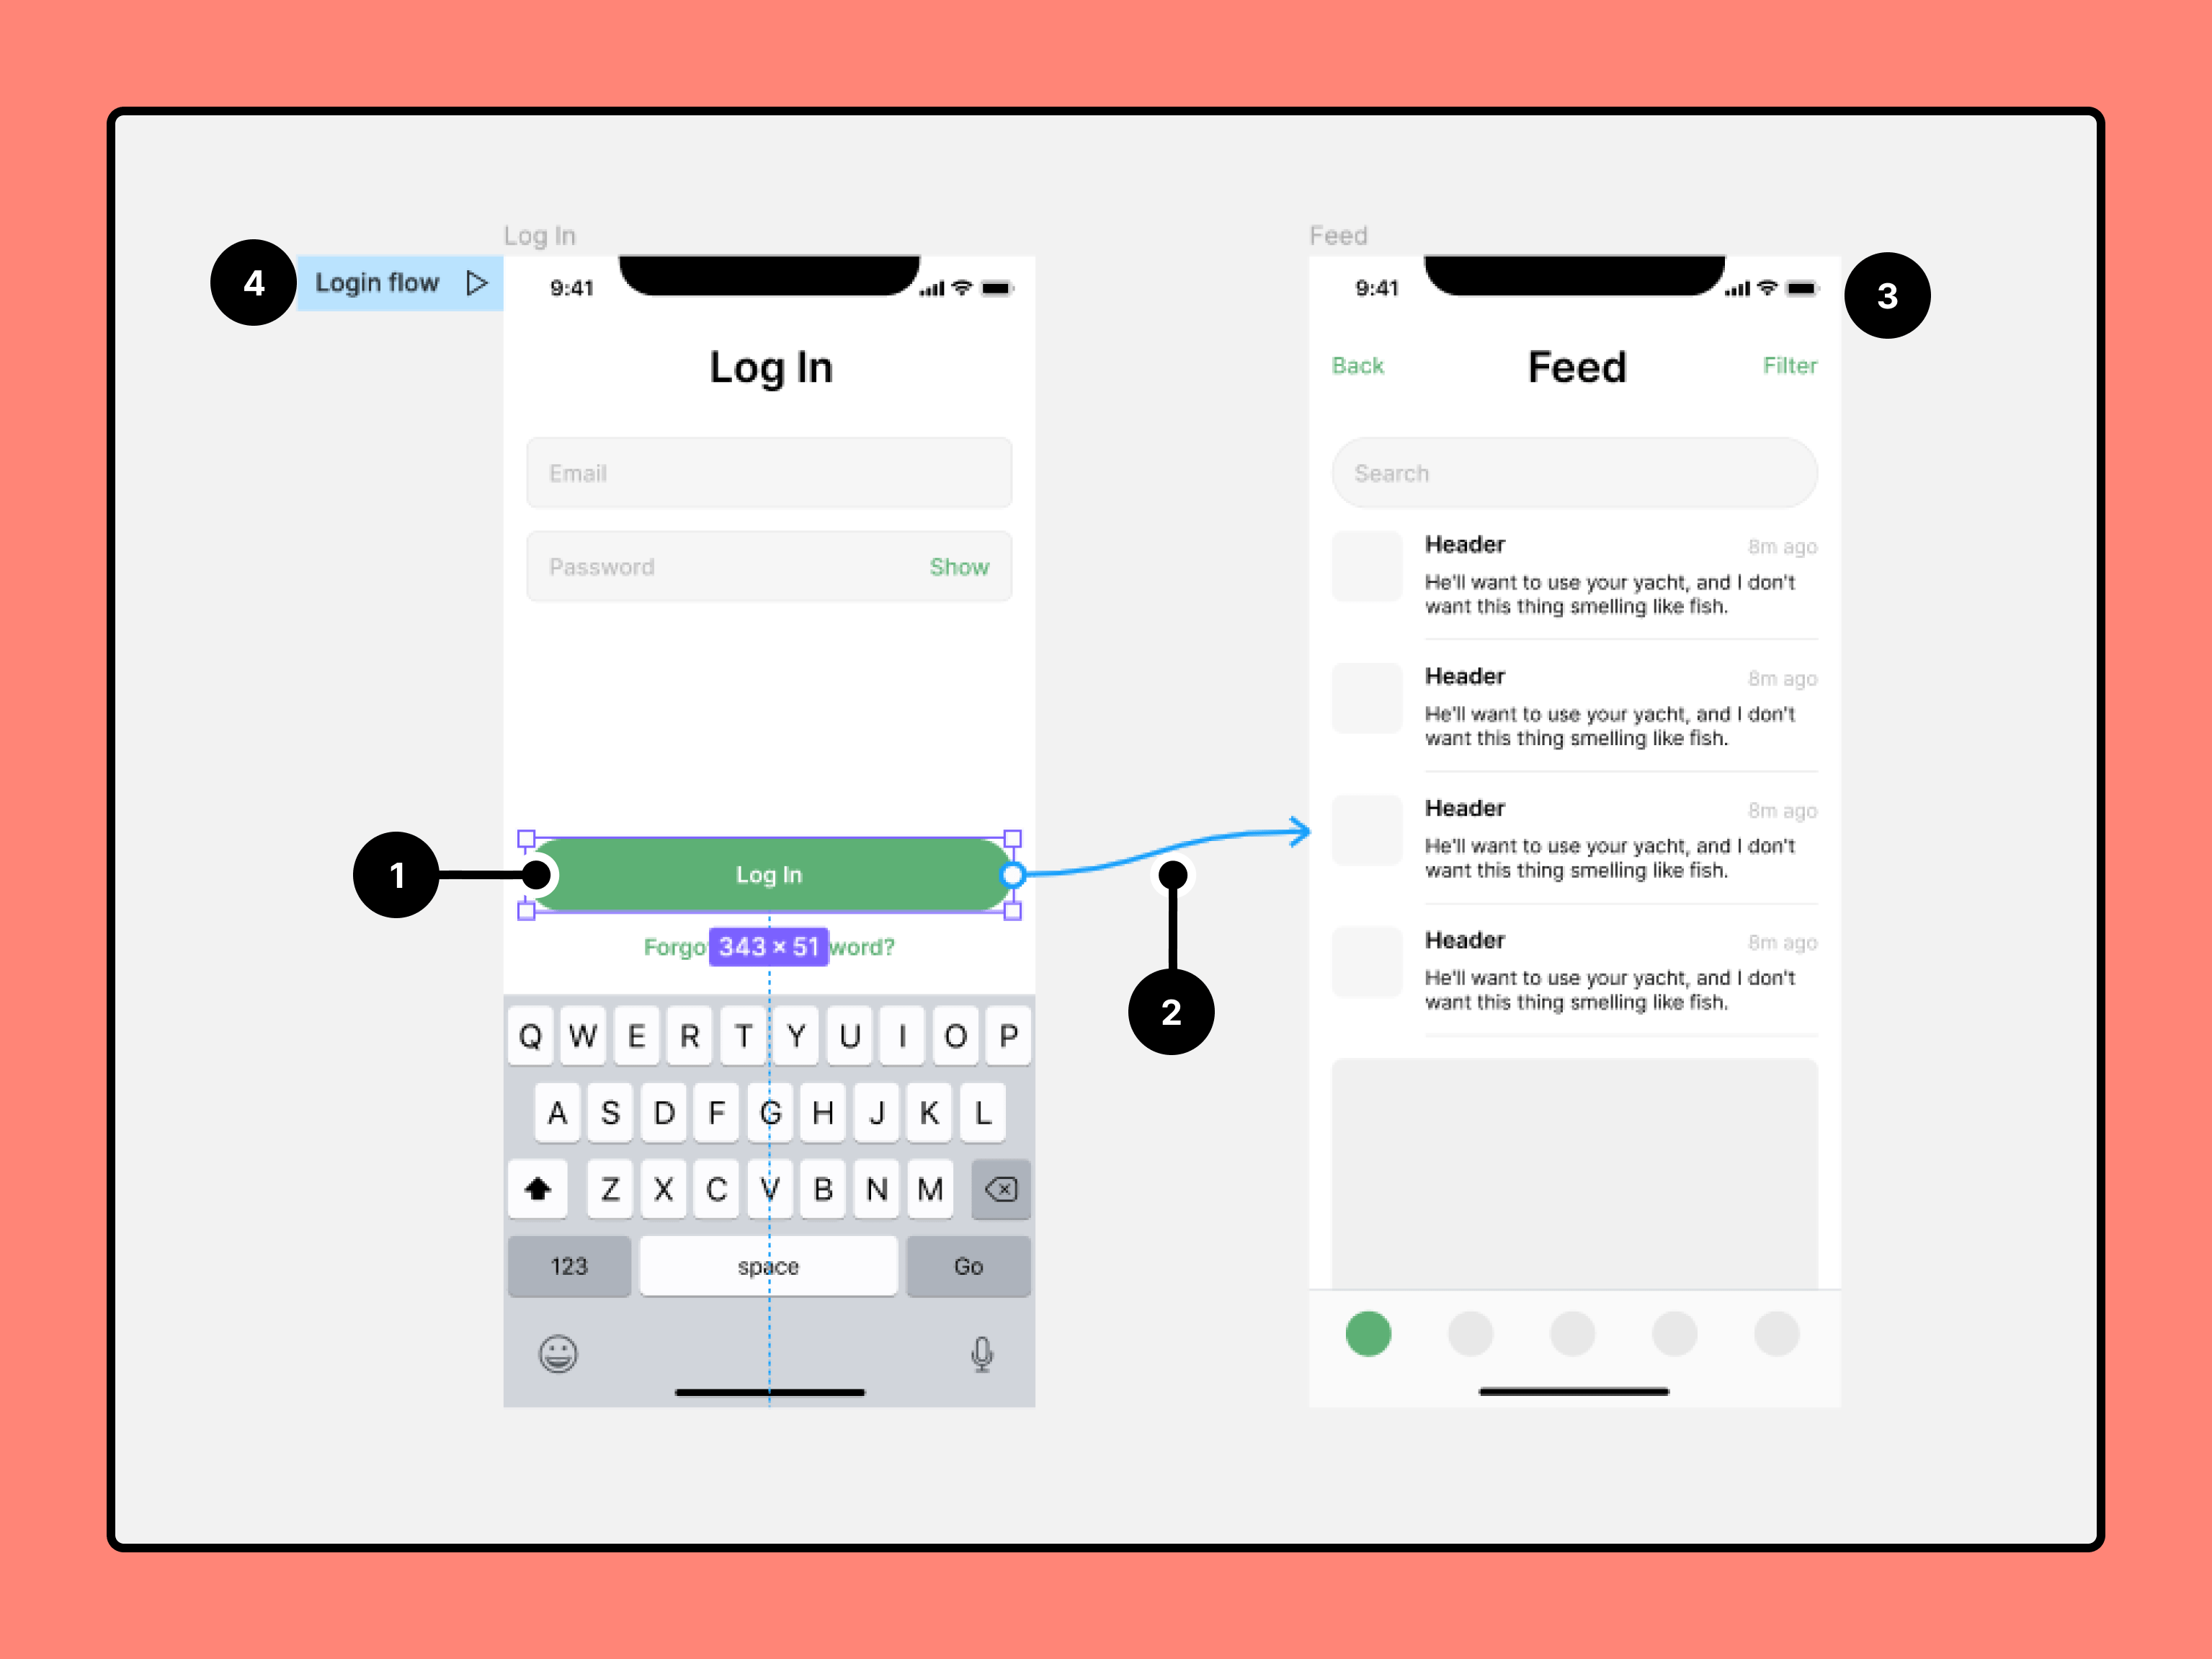
Creating interactive prototypes in Figma is a powerful way to visualize user flows and test interactions before development. Here are some tips to make your prototyping process more efficient:
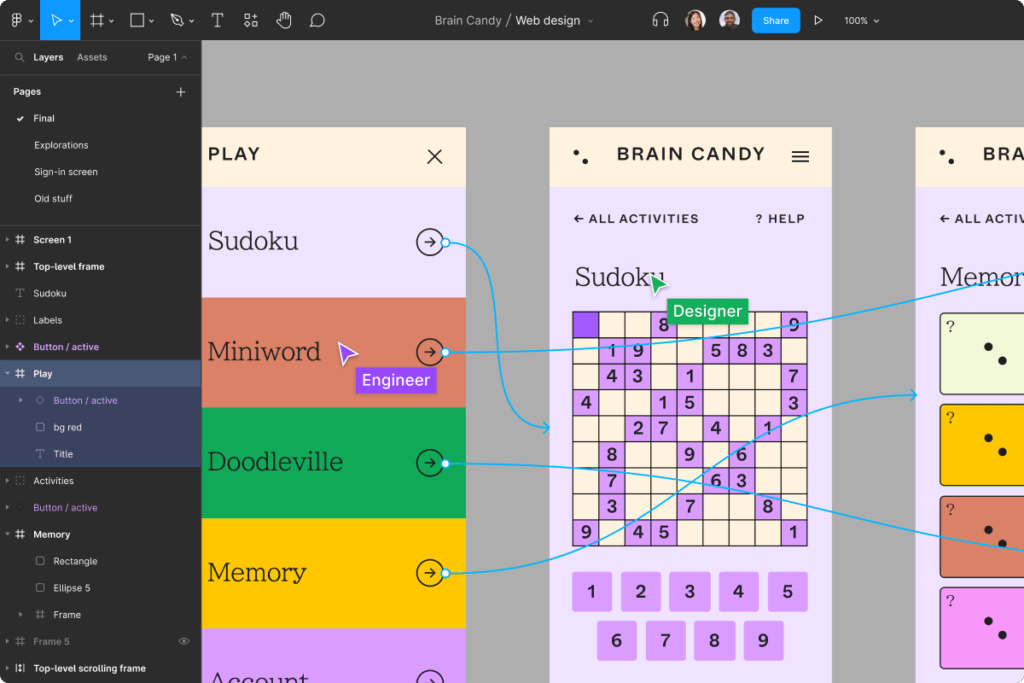
- Linking Screens: Use master components to speed up prototype connections. For example, if you have a navigation bar that appears on multiple screens, turn it into a component and link each menu item to the appropriate frame. This way, any instance of the component will inherit these connections, saving you time.
- Adding Animations and Transitions: Figma’s prototyping features allow you to add animations and transitions to your designs. Use the Prototype tab to create interactions such as on-click, hover, and drag. You can also apply animations like Smart Animate to create smooth transitions between frames. This makes your prototypes more dynamic and realistic, enhancing the user testing experience.
Collaboration
Figma’s real-time collaboration features make it an ideal tool for team projects. Here are some best practices for collaborating effectively:
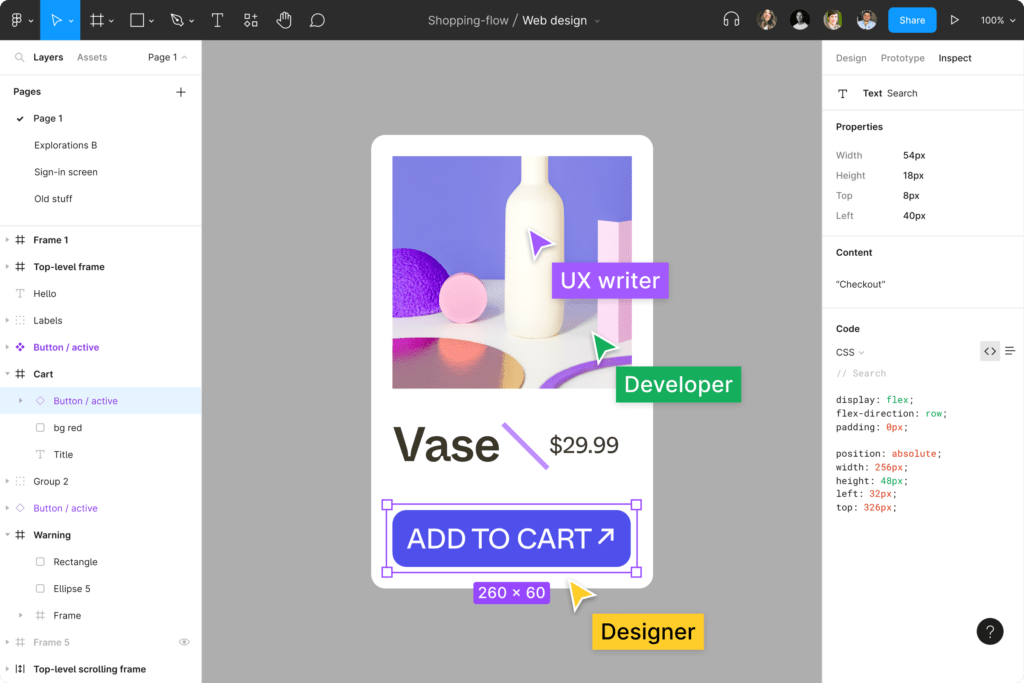
- Sharing Projects: You can share your Figma files, prototypes, and projects with team members by sending them a link or inviting them directly. Ensure that everyone has the appropriate permissions, whether it’s view-only or edit access, to maintain control over your designs.
- Commenting and Feedback: Utilize Figma’s commenting and annotation tools to facilitate asynchronous communication and feedback. Team members can leave comments directly on the design, making it easy to discuss ideas and address concerns. Regular check-ins, design critiques, and retrospective sessions can further enhance collaboration and ensure that everyone is aligned.
Batch Automation
Automation tools are a fantastic way to streamline your Figma workflow by reducing the time spent on repetitive tasks. These tools can help you maintain consistency and efficiency across your projects.
- Batch Styler: This plugin allows you to apply consistent styling across multiple elements. Whether you need to change text styles or update color schemes, Batch Styler can handle it all at once.
- Similayer: This plugin helps you select layers with similar properties, making batch editing much simpler. For instance, if you want to update all buttons in your design to have the same border radius, Similayer can quickly select all relevant layers, allowing you to make changes in one go.
Automating Exports
Exporting assets can be a time-consuming task, especially when dealing with multiple files and formats. Automating this process can save you significant time and effort.
- Setting up Export Presets: Figma allows you to set up export presets for different file types and resolutions. By defining these presets, you can ensure that your assets are consistently exported in the correct format and size, reducing the need for manual adjustments each time.
- Using Plugins for Batch Exports: Plugins like Zeplin can automate the export process by marking layers for export and optimizing them for different formats. Zeplin’s auto-export feature ensures that even if you forget to mark certain layers, they will still be exported correctly, saving you from potential back-and-forth with your development team.
How Does Figma Help with Your Productivity?

Workspace Optimization
An optimized workspace can significantly enhance your productivity by reducing distractions and making tools more accessible.
- Customizing the Figma Interface: Tailor the Figma interface to suit your workflow. You can rearrange panels, hide unnecessary tools, and create a workspace that minimizes clutter. This customization helps you focus on your design tasks without unnecessary distractions.
- Setting up Custom Shortcuts: While Figma’s default shortcuts are handy, creating custom shortcuts can further streamline your workflow. Custom shortcuts allow you to access frequently used tools and actions quickly, reducing the time spent navigating menus.
Time Management
Effective time management is crucial for maintaining productivity and meeting deadlines. Here are some strategies to help you manage your time more effectively while working in Figma:
- Breaking Down Tasks: Divide your projects into smaller, manageable tasks. This approach makes it easier to track progress and ensures that you stay on schedule. Use tools like Gantt charts or task lists to visualize your workflow and keep track of deadlines.
- Prioritizing Work: Focus on high-priority tasks that have the most significant impact on your project. Prioritizing your work helps you allocate your time and resources more effectively, ensuring that critical tasks are completed first.
Conclusion
In this blog post, we’ve explored strategies to enhance your Figma workflow, including mastering shortcuts, using essential plugins like Content Reel and Unsplash, setting up design systems, and automating repetitive tasks.
Implementing these tips means you can boost your productivity and maintain consistency across projects. We encourage you to try these techniques to transform your Figma experience.
So, why join Figma? Because it’s not just a design tool—it’s a platform that empowers you to create, collaborate, and innovate with ease. Happy designing!


No Comment! Be the first one.