Table of Contents
- Getting Started with Figma
- Mastering the Design Toolbox
- Building Blocks of Design: Working with Objects and Layers
- Introducing Figma Components: Reusable Design Elements
- Prototyping 101: Bring Your Designs to Life
- Putting it All Together: Practice Makes Perfect!
- Conclusion: Your Figma Adventure Starts Now
Ever needed to whip up a social media graphic, design a simple website mockup, or create a visual presentation, but felt overwhelmed by complex design software? That’s where Figma steps in as your design superpower! Figma is a cloud-based design tool that’s incredibly user-friendly, even for absolute beginners. It puts the power of design right in your web browser. Mastering the basics of Figma will help you create designs confidently, streamline your workflow, collaborate with others more easily, and unlock your creative potential.
Unleash your inner designer! Get ready to dive into the most important Figma essentials. By the end of this beginner’s guide to Figma, you’ll be creating visuals that make an impact with ease.
Disclaimer: This site contains affiliate links, which means we may receive a small commission for purchases made through them (at no extra cost to you!). This helps us keep creating great content.
Getting Started with Figma
Embarking on your Figma journey begins with a simple yet essential step: setting up your account. Figma offers a straightforward signup process that can be completed in minutes.
Visit Figma’s website, choose a plan that suits your needs (there’s a free option that’s perfect for beginners), and follow the prompts to create your account. Once you’re in, you’ll be greeted by Figma’s intuitive interface, which is designed to make your transition into the world of design as smooth as possible.
Understanding the Workspace
Figma’s workspace is where your ideas will take shape, and understanding its core elements is crucial.
Here’s a quick rundown of the essentials:
- Toolbar: Located at the top, the toolbar contains tools for selecting, moving, and adjusting elements within your designs. It’s your go-to for the basic actions you’ll perform in Figma.
- Layers Panel: On the left side, you’ll find the layers panel. This is where all the elements (or objects) you create in your document are listed. Understanding how to use layers effectively is key to managing complex designs.
- Document Window: The large central area is your canvas or document window. This is where you’ll visually create and manipulate your designs. It’s where your ideas come to life.
Creating Your First Frame
In Figma, frames are the containers for your designs. They can represent anything from a mobile phone screen to a web page layout or even components within those layouts.
Here’s how to create your first frame:
- Select the Frame Tool: In the toolbar, click on the frame tool icon or press ‘F’ on your keyboard. This changes your cursor, indicating you’re now in frame creation mode.
- Draw Your Frame: Click and drag on the document window to draw your first frame. You can adjust its size to fit your design needs, whether that’s a standard screen size for mobile or web, or a custom size for specific elements.
- Customization: Once your frame is created, you can start adding elements to it. Use the toolbar to add shapes, text, and more. Each element can be customized in terms of size, color, and other properties to match your vision.
By following these steps, you’ve set up your Figma account and familiarized yourself with the workspace and created your first frame. This foundation in Figma essentials paves the way for you to explore more advanced features and techniques as you continue your journey in design.
Mastering the Design Toolbox
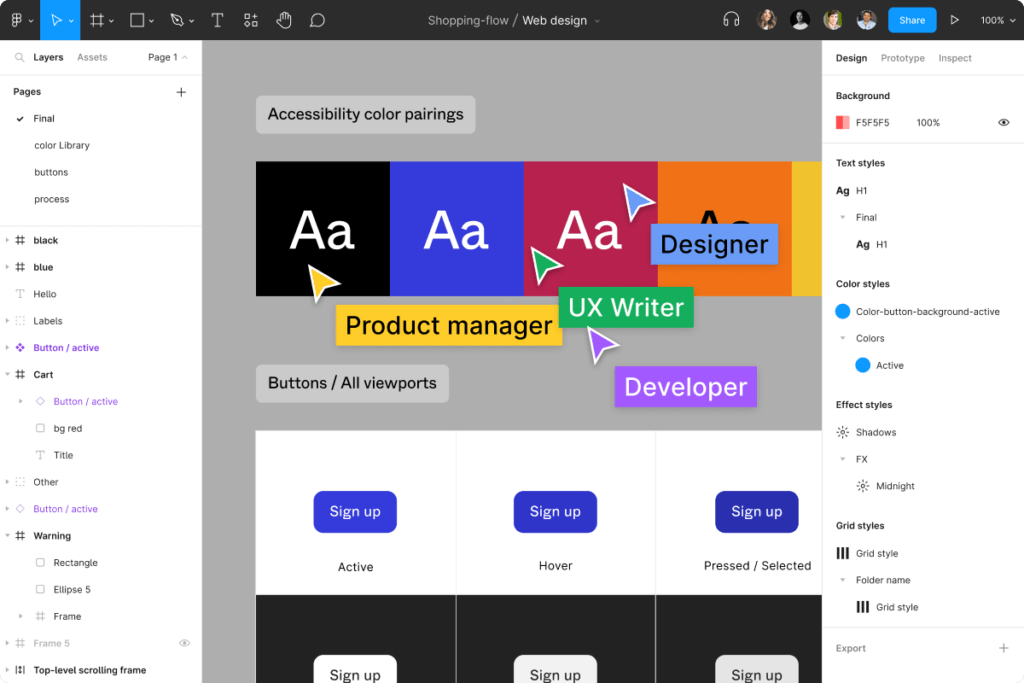
Venturing further into the Figma essentials, understanding and utilizing Figma’s design toolbox is crucial for bringing your creative visions to life. Let’s dive into the basics of shaping, text manipulation, and color selection to elevate your design skills.
Shape Up!
Figma’s vector tools offer a simple yet powerful way to create basic shapes—rectangles, circles, and lines—that form the building blocks of most designs.
- Creating Shapes: To create a shape, select the corresponding tool from the toolbar. For a rectangle or square, choose the Rectangle Tool (R), for circles or ellipses, select the Ellipse Tool (O), and for lines, click on the Line Tool (L). Click and drag on the canvas to draw the shape.
- Modifying Shapes: Once a shape is drawn, you can easily modify its properties. To adjust size, drag the bounding box handles. To change color, use the fill option in the right-hand properties panel. Figma also allows you to round corners by adjusting the corner radius, giving your shapes a softer look.
Text Tools
Adding and formatting text is essential for communication in your designs. Figma provides comprehensive text tools for this purpose.
- Adding Text: Select the Text Tool (T) and click anywhere on your canvas to start typing. Enter your desired text and click away to set it.
- Formatting Options: With the text selected, the right-hand properties panel offers various formatting options. You can change the font type, size, color, and alignment here. Figma supports a wide range of fonts, or you can upload your own to ensure brand consistency.
Color Confidence
Color is a powerful tool in design, capable of evoking emotion and highlighting information. Mastering color selection is a Figma essential.
- Using the Color Picker: With an object selected, click on the color preview in the properties panel to open the color picker. Here, you can select a color directly, enter a hex code, or choose from saved styles.
- Understanding Basic Color Theory: Basic color theory concepts can help you select colors that work well together. Consider using complementary colors for contrast, analogous colors for harmony, or monochromatic schemes for a unified look. Figma’s color tools make experimenting with these concepts easy and intuitive.
By mastering these foundational tools in Figma—shapes, text, and color—you’re well on your way to creating visually compelling designs. Each step forward in mastering the Figma essentials boosts your design efficiency and enhances your ability to communicate visually, a critical skill in today’s digital landscape.
Remember, the key to proficiency is practice, so don’t hesitate to experiment with these tools as you continue to explore the vast possibilities Figma offers.
Building Blocks of Design: Working with Objects and Layers
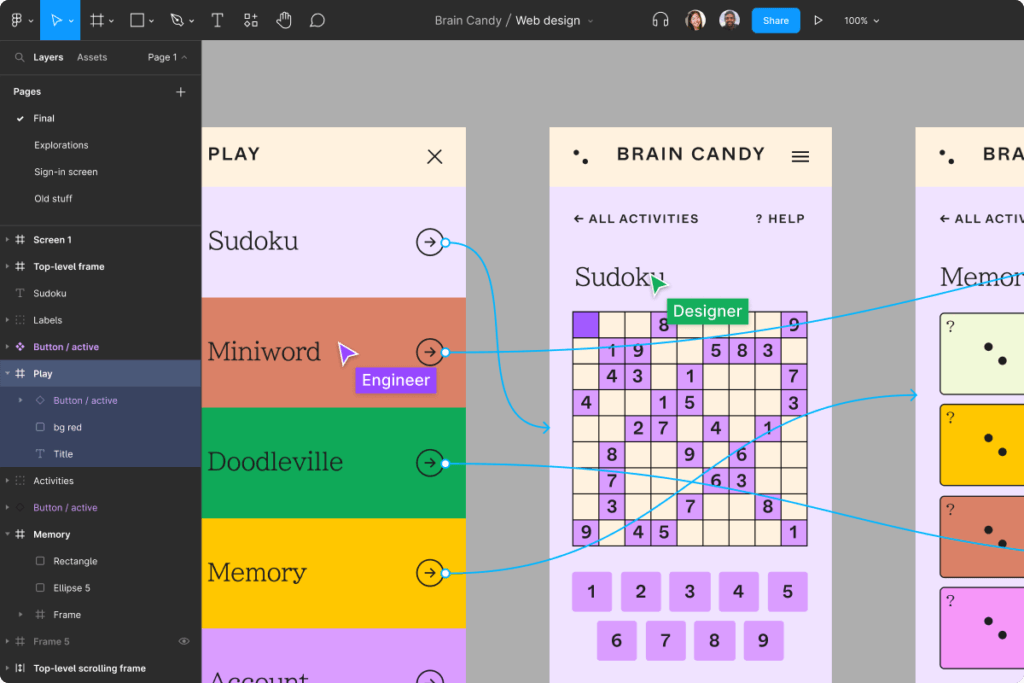
Navigating through Figma’s environment requires a solid understanding of how to work effectively with objects and layers—key components in crafting your designs. This section will explore the essential skills of selection, layer management, and grouping to enhance your workflow in Figma.
Selection Magic
The ability to select, move, and resize objects with precision is foundational in Figma. Here’s how to master these actions:
- Selecting Objects: Click on an object to select it. For multiple selections, hold the Shift key while clicking on additional objects. The Move Tool (V) is your go-to for basic selection and movement tasks.
- Moving Objects: With the object(s) selected, simply drag them to a new location. For finer control, use the arrow keys to nudge the object in small increments.
- Resizing Objects: Hover over the bounding box of a selected object until you see the double-sided arrow, then click and drag to resize. Hold the Shift key while resizing to maintain the object’s proportions.
Understanding and utilizing these selection tools allows for efficient manipulation of design elements, laying the groundwork for more complex operations.
Layering Like a Pro
Layers play a critical role in organizing the components of your design, making it easier to manage complex projects.
- Understanding Layers: Every object you create in Figma automatically occupies its own layer. The Layers Panel on the left side of the interface displays all the layers in your current frame or page, organized in a hierarchical structure.
- Organizing Layers: Proper layer organization is key to a smooth design process. Rename layers or objects to make them easily identifiable. You can also reorder layers by dragging them within the Layers Panel; objects higher in the list will appear on top of those lower down.
Effective layer management ensures that your design space remains organized, allowing for quicker alterations and a clearer visual hierarchy.
Grouping for Efficiency
Grouping multiple objects is a powerful way to streamline your design process, ensuring consistency and simplifying manipulations.
- Creating Groups: Select two or more objects and right-click to choose “Group” or use the shortcut Ctrl + G (Command + G on Mac). This combines the selected objects into a single group, making it easier to move or modify them as a unit.
- Editing Groups: To edit an individual object within a group, double-click the group to enter isolation mode. Here, you can adjust the object without ungrouping. Click outside the group to exit isolation mode.
- Ungrouping: If you need to separate the objects again, right-click the group and select “Ungroup” or use the shortcut Ctrl + Shift + G (Command + Shift + G on Mac).
Practice Time!
- Create a simple icon with overlapping shapes. Use the layers panel to adjust which shapes are in front or behind.
- Design a website header with a logo, navigation text, and a background image. Experiment with grouping elements for easier editing.
Mastering the use of groups will significantly enhance your efficiency, allowing for rapid adjustments while maintaining the integrity of your overall design.
By understanding these Figma essentials, you’re well-equipped to manipulate objects and layers effectively, setting a strong foundation for your design projects. Remember, practice is crucial to becoming proficient in Figma, so don’t hesitate to experiment with these tools and techniques as you develop your design skills.
Introducing Figma Components: Reusable Design Elements
As you become more familiar with the Figma essentials, one powerful feature that stands out for its efficiency and consistency is Figma components. Components are reusable design elements that can be incredibly beneficial, whether you’re crafting buttons, icons, logos, or any other repeatable element within your projects.
The Benefits of Using Components
Figma components serve as the building blocks for your designs, offering several key advantages:
- Maintain Design Consistency: By using components, you ensure that every instance of a component remains uniform across your project. This is crucial for keeping a consistent look and feel, whether you’re working on a single project or across multiple design files.
- Save Time: Components allow you to make widespread changes from a single location. For example, updating a button’s color in the component master will automatically update all instances where that button is used, saving you the hassle of manually adjusting each one.
Creating and Using Components
Creating and implementing components in your design workflow is straightforward:
- Creating a Component: To create a component, start by designing the element you wish to reuse, such as a button. Once you’re satisfied with the design, select it, right-click, and choose “Create Component,” or use the shortcut Ctrl + Alt + K (Cmd + Opt + K on Mac). You’ll notice the component now has a unique outline, indicating it’s a master component.
- Using Components: Once a component is created, you can drag instances of it from the Assets Panel onto your canvas. These instances are linked to the master component, meaning any changes made to the master will reflect in all instances.
- Editing Components: If you need to make an instance of a component different (for example, changing the text on a button), you can override specific properties of that instance without affecting the master component or other instances. This flexibility allows for customization while still maintaining overall consistency.
By integrating Figma components into your design process, you leverage a powerful tool that enhances productivity and ensures uniformity across your projects. This foundational knowledge of components is an essential part of mastering Figma, enabling you to design more efficiently and effectively.
Remember, the best way to become comfortable with components is by applying them in your real-world projects, so don’t hesitate to experiment and discover the full potential of this feature.
Prototyping 101: Bring Your Designs to Life
An integral part of mastering the Figma essentials is understanding how to bring static designs to life through prototyping. Prototyping in Figma allows designers to simulate user interactions, such as clicking a button or navigating through an app, making it a powerful tool for testing and improving the user experience before any code is written.
What is Prototyping?
Prototyping transforms your designs into interactive models that mimic how the final product will function. It enables designers, clients, and stakeholders to explore and validate the user flow and interface design through a series of interactions and transitions.
- Prepare Your Frames: Start with at least two frames in your Figma document. The first frame could be a landing page with a button, and the second frame could be the subsequent page the user sees after clicking the button.
- Select Your Interactive Element: Click on the button in your first frame. This is the element you’ll set up to trigger the transition to the next frame.
- Enter Prototype Mode: In the top-right corner of the interface, switch from the Design to the Prototype tab. This changes the context of the properties panel to prototype settings.
- Create the Interaction: With the button still selected, you’ll notice a small node (looks like a circle or plus icon) on the right side of the element. Click and drag this node to the second frame. This action creates a connection between the button and the destination frame.
- Define the Interaction Details: Once you release the mouse button over the second frame, a menu appears, allowing you to define the specifics of the interaction. For a simple prototype, set the trigger to “On Click” and the action to “Navigate to.” You can also choose an animation effect to smooth the transition between frames.
- Test Your Prototype: Click the “Present” button in the top-right corner to view your prototype in presentation mode. Now, when you click the button in your prototype, it should lead you to the second frame, simulating the interaction as it would occur in the final product.
This basic example of prototyping showcases the power of Figma to not only design, but also to test and iterate on those designs through interactive prototypes. By incorporating prototyping into your workflow, you can significantly improve the usability and effectiveness of your designs, ensuring they meet user needs and expectations.
Prototyping is a crucial step in the design process, allowing you to explore, test, and refine your ideas. As you become more comfortable with Figma essentials, incorporating prototyping early and often in your projects will become a natural part of your design thinking, ultimately leading to more engaging and user-friendly designs.
Putting it All Together: Practice Makes Perfect!
The best way to learn Figma is by doing. Here are some ideas to get you started:
- Recreate Designs: Find a simple website layout or social media graphic you like. Try recreating it in Figma to solidify your understanding of shapes, text, and layout.
- Redesign Time: Take an existing website or app you use and think about how you would improve its design. Create a mockup of your improved version in Figma!
- Challenge Yourself: Participate in daily or weekly design challenges online. You’ll get prompts and inspiration to practice specific Figma skills.
Resources for Further Learning
To further bolster your learning curve, there’s a wealth of resources available:
- Figma’s Help Center: Packed with official tutorials and guides
- Figma Community: Connect with other designers, get help, and find inspiration
- YouTube Channels: Search for “Figma Beginner Tutorials” and find channels that resonate with your learning style.
Remember, every design you create is a step forward. Experiment, have fun, and let your creativity shine through!
Conclusion: Your Figma Adventure Starts Now
You’ve mastered the Figma essentials, and the design world is at your fingertips! Remember these key points:
- Figma is your friend: Its intuitive interface makes designing surprisingly easy and even fun.
- Every step counts: Keep practicing, building your skills and confidence.
- Inspiration is everywhere: Look at websites, apps, even everyday objects for design ideas to adapt in your creations.
The design journey never ends! Keep exploring Figma’s powerful features, and don’t be afraid to try new things.




No Comment! Be the first one.